 |
|
Call Us:
1-877-744-1221
|
Browse Submit a Ticket |
OverviewInstalling Knowledgebase Manager Pro means uploading files to your web server and completing the simple installation wizard. The wizard will ask you to configure file system permissions, database, administrator account and some other settings. Uploading FilesTo upload Knowledgebase Manager Pro you need to unzip contents of the "package" directory from the latest KMP package onto your local hard drive and, using an FTP client for example, login to your web server and copy Knowledgebase Manager Pro files through. To start the setup wizard, navigate to the directory you have uploaded Knowledgebase Manager Pro to. For example if you uploaded files to the "kmp" under the web root, open http://www.yoursite.com/kmp/ in your browser to start. If you have a blank screen instead of the installation wizard check if JavaScript is enabled in your browser. If you get a "Don't have permissions" error, check this guide for help. PHP
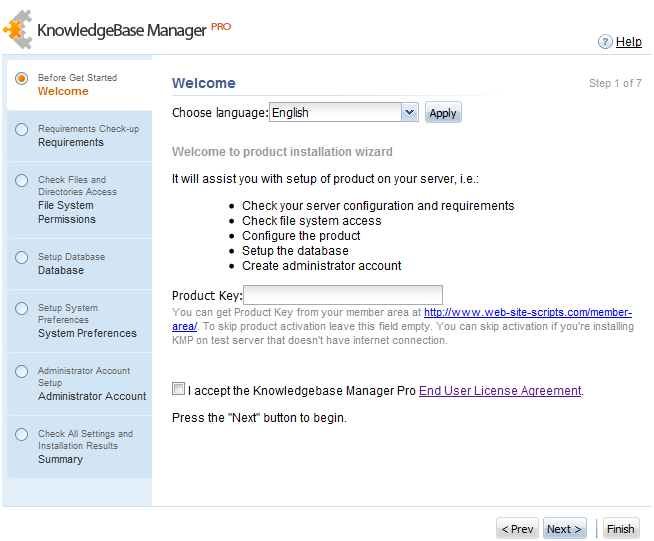
You need to have PHP already installed on the server to start Knowledgebase Manager Pro installation. If you do not have it yet, check this guide to find out how to install PHP. You will see the following page. Choose language if necessary and click "Apply".
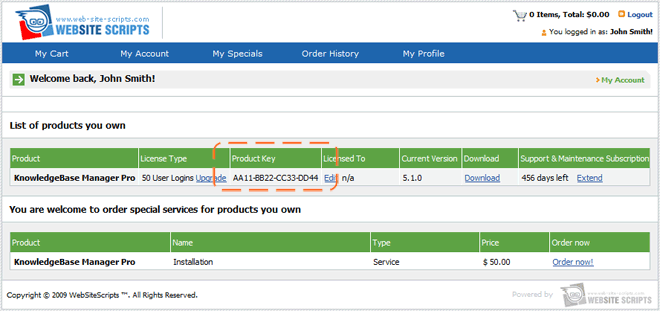
Enter the product key. You can get it from your account in the member area.
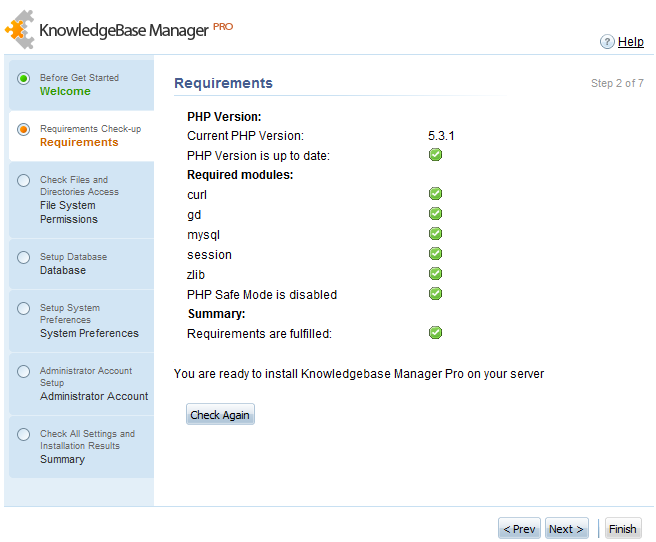
You can skip activation if you're installing KMP on a test server that doesn't have internet connection. To skip product activation leave this field empty. You must also agree with End-User License Agreement to proceed. Click "Next" to start the installation. RequirementsFor a successful installation of the Knowledgebase Manager Pro your sever must match the system requirements.
On this step you may be asked to install the required modules. Curl setupIf you are asked to install Curl, chose follow one of the guides below according to your server preferences:
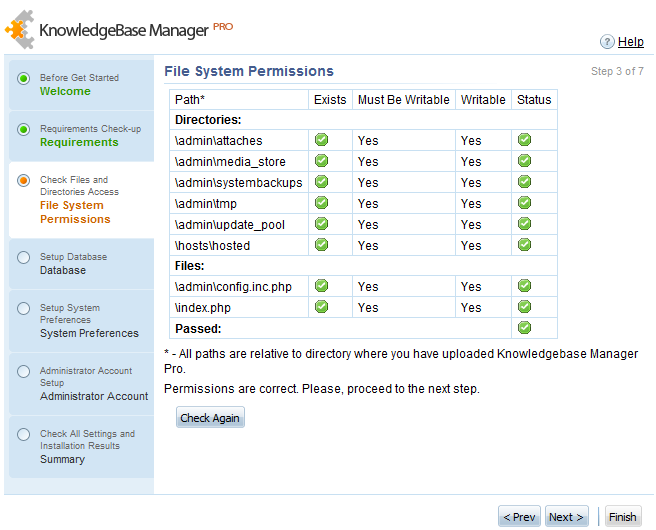
File System PermissionsKnowledgebase Manager Pro requires some files and directories to have special permissions set. The exact permissions may vary from server to server however the ones that should work on the majority of servers are: write and read permissions for owner and read permissions for others. It can be set up by chmod 755 (or chmod 777 depending on server configuration) command for folders and chmod 644 (or chmod 666) command for files in UNIX systems. Open our guide that describes how to set files and folders access permissions efficiently in a new window or browser tab. It will help you to set necessary permissions right now in a few clicks and it also includes the directions for setting secure permissions after installation. You cannot proceed to the next step until all the system permissions are set up correctly. If you have some difficulties with this step do not hesitate to contact our support or your system administrator.
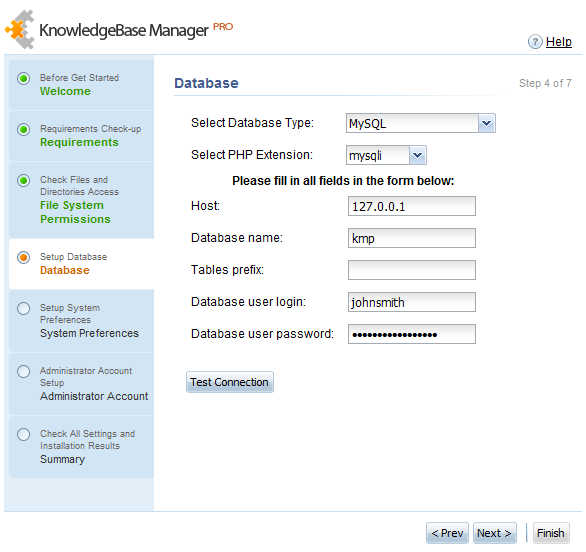
Database SetupKnowledgebase Manager Pro supports MySQL and MS SQL database to store the data. Select a desired database type and then select a PHP extension which you're going to use. If it says that no extensions for your database type are available, learn how to install PHP extensions for databases.
You need to create an empty database on this step. This is usually can be done within Control Panel or cPanel web interface of your hosting account. If it asks you for character set and collation, please select character set: utf8, and collation: utf8_general_ci (this is needed to MySQL). Your MySQL or MS SQL user account should also be granted full access to that database (including CREATE TABLE and ALTER TABLE operators) because installation wizard will need to create some tables and fill this database during the setup process. If you do not have MySQL on your server, check this guide to find out where to get it. For MySQL: the "STRICT_TRANS_TABLES" option must be disabled. If you're installing it on MSSQL make sure that Full-text Indexing is enabled. This must be done prior to the installation. If you're using MSSQL, you need to specify an account with SQL Server instead of using Windows Pass-through authentication when connecting to MSSQL. Host names "localhost" and "127.0.0.1" are common for most servers where web server software (e.g. Apache or IIS) and database are installed on the same machine (it is true for most hosting plans and when you install it on your PC or server), but if the Installation Wizard is unable to connect to the database server with this address, check for your hosting account documentation or contact your ISP or system administrator for correct SQL server name or IP address. If your database server uses non-default port, you can specify it within the host field separated by colon from the host name itself, e.g. "127.0.0.1:3307" Tables prefix field should be empty by default. This is optional field that allows you to install Knowledgebase Manager Pro to the database that already contain tables of some other software. Tables prefix is added to a table name without any additional symbols, i.e. if you set "kmp_" as prefix and the table named "accounts" is going to be created, then setup wizard will name it "kmp_accounts". Click "Test" to check the database connection and if it is successful, click "Next" to fill the database. What if the database population process stops and it doesn't let you go on?
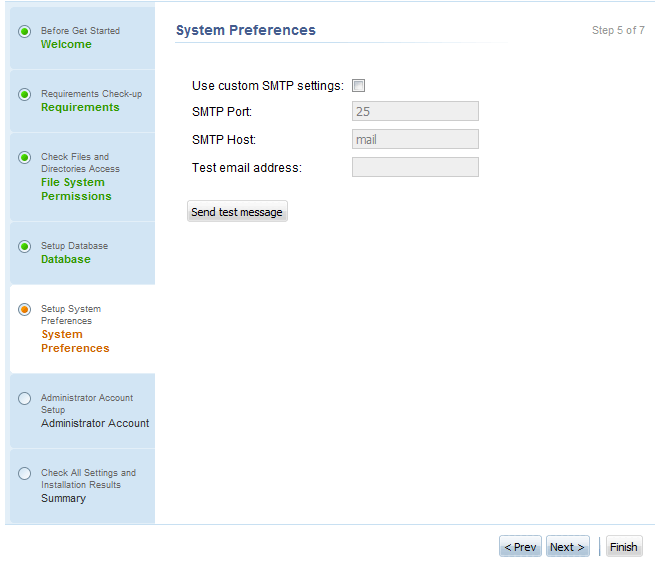
Sometimes after successful database connection you click "Next" and it starts populating the database, but after about 30 seconds it stops. This happens because PHP and FastCGI timeouts are too low and script is unable to complete database population in time. In this case you need to setup recommended PHP and FastCGI settings. Then try again. System PreferencesOn this step you can set up SMTP settings. Default SMTP settings are detected automatically and work on most servers so you do not usually need to change them. If you do not receive test email (check SPAM folder first), you can contact your ISP or refer to your hosting documentation to receive custom SMTP settings. These settings can be changed after installation.
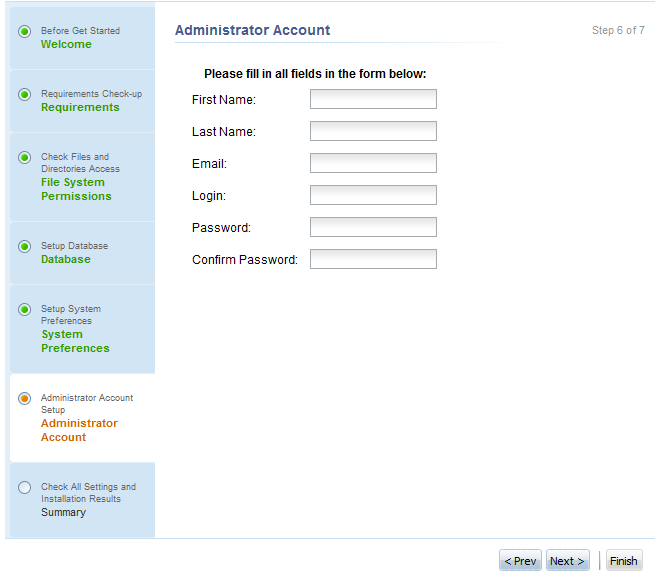
When all corrections are done, click the "Next" button. Administrator's AccountHere you need to enter your name, e-mail, create login and password and click "Save" button. Please remember your login and password. You will need them to login to Knowledgebase Manager Pro.
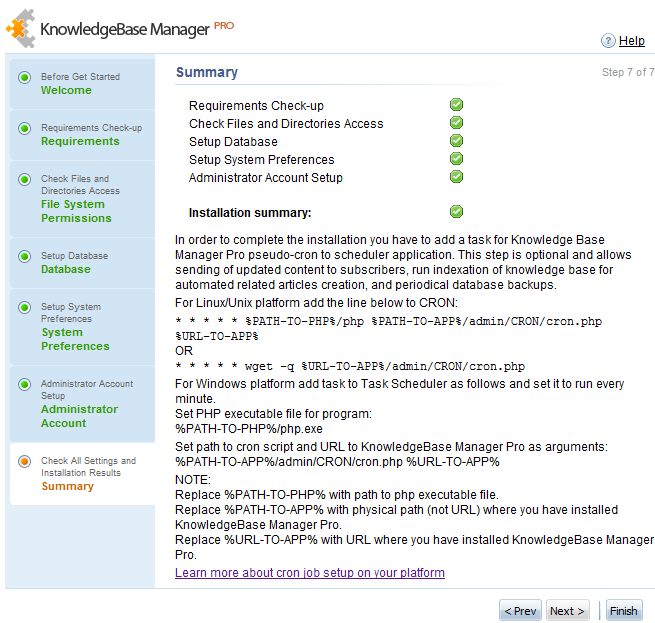
SummaryThis is the last step of the installation wizard. Here you can check all the settings and installation results made in the previous steps and setup cron jobs.
In order to complete the installation you should add a task for Knowledge Base Manager Pro pseudo-cron to scheduler application. This step is optional and allows sending of updated content to subscribers, run indexation of knowledge base for automated related articles creation, periodical database backups, and attachments indexation. Cron setup guidesChose your platform: If everything is arranged purely, then you get the green light to finish the installation process by clicking on "Finish" button. If you get any errors or other issues after installation, please take a look at troubleshooting section. If you can't find the solution there, feel free to submit your question at our support center. Later, you can check the post installation checklist to enable and configure additional features and fine-tune system preferences. Custom Fields
|
|
|
| PHP Helpdesk Software by: KnowledgeBase Manager Pro v6.2.2 (Built with: JS.GUI - AJAX Application) |


